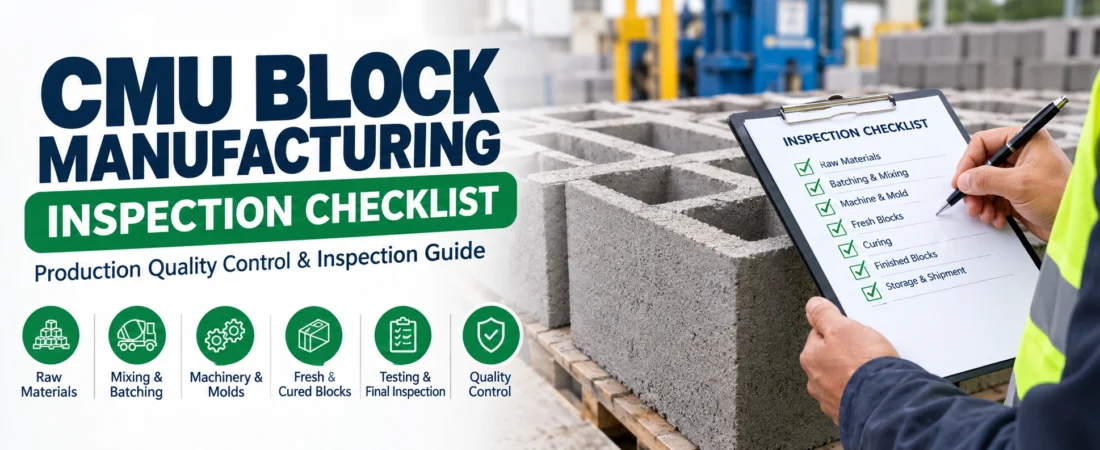
Manufacturing high-quality Concrete Masonry Units (CMUs) requires regular inspection throughout the entire production process. Checking blocks only after manufacturing is not enough because many defects can begin earlier during material preparation, batching, mixing, molding, vibration, compaction, or curing.
A properly organized CMU Block Manufacturing Inspection Checklist helps manufacturers identify problems early, reduce rejected blocks, maintain consistent dimensions and appearance, and improve production efficiency.
This checklist can be useful for small block plants as well as larger automated CMU manufacturing facilities.
What Is a CMU Manufacturing Inspection Checklist?
A CMU manufacturing inspection checklist is a structured list of inspections performed at different stages of concrete block production.
It can cover:
- Raw materials
- Mix design
- Batching
- Mixing
- Production machinery
- Molds
- Vibration
- Compaction
- Fresh blocks
- Curing
- Finished block dimensions
- Density
- Surface quality
- Strength testing
- Pallets
- Storage
- Production records
The purpose is to make sure that problems are identified before an entire production batch is affected.
Why Is CMU Manufacturing Inspection Important?
Regular inspection helps manufacturers:
- Maintain consistent block quality
- Reduce defective products
- Detect machine problems early
- Reduce material waste
- Improve production efficiency
- Maintain dimensional consistency
- Reduce customer complaints
- Improve product reliability
- Identify recurring defects
- Support continuous improvement
Quality inspection should not be treated as something that happens only at the end of production. It should continue from raw material preparation through the finished product.
CMU Manufacturing Inspection Process
A practical inspection system can be divided into several stages:
- Raw material inspection
- Mix design inspection
- Batching inspection
- Mixing inspection
- Machine inspection
- Mold inspection
- Vibration and compaction inspection
- Fresh block inspection
- Curing inspection
- Finished block inspection
- Testing
- Storage and handling inspection
- Documentation and corrective action
Each stage provides an opportunity to identify problems before they become larger production issues.
1. Raw Material Inspection Checklist
Quality inspection starts before the first batch is mixed.
Manufacturers should inspect the materials used to produce CMU blocks and make sure their condition is consistent with the production requirements.
Cement Inspection
Check:
- Cement type
- Product condition
- Storage condition
- Moisture contamination
- Storage duration
- Consistency between deliveries
Cement should be stored properly and protected from moisture.
Aggregate Inspection
Inspect:
- Cleanliness
- Particle size
- Grading
- Contamination
- Excessive moisture
- Oversized particles
Inconsistent or contaminated aggregates can affect block appearance, density, strength, and production consistency.
Sand Inspection
Check:
- Grading
- Cleanliness
- Moisture
- Clay or contaminant content
- Consistency between deliveries
Water Inspection
Check that the water used for production is suitable and consistently controlled.
Admixtures and Pigments
If admixtures or pigments are used, inspect:
- Product identity
- Dosage
- Storage condition
- Batch consistency
- Mixing procedure
For more information about CMU materials and mix proportions, see our:
Consistent raw materials are the foundation of quality block production. Learn more about material proportions and production requirements in our CMU Block Mix Design Guide.
2. CMU Mix Design Inspection
The concrete mixture should be checked before production begins.
Inspect:
- Cement quantity
- Aggregate quantity
- Sand quantity
- Water content
- Admixture dosage
- Pigment dosage, if applicable
- Aggregate moisture correction
- Target consistency
A change in aggregate moisture can affect the actual water available in the mixture, so moisture conditions should be considered during batching.
The goal is to maintain a consistent mixture from one production batch to the next.
3. Batching Inspection Checklist
Before mixing, verify that the correct quantities of each material are being delivered to the mixer.
Check:
- Correct material
- Correct quantity
- Weighing system
- Scale accuracy
- Batch sequence
- Material identification
- Moisture adjustment
Incorrect batching can create variations in:
- Strength
- Density
- Color
- Texture
- Workability
- Block weight
If a production batch suddenly behaves differently from previous batches, batching accuracy should be one of the first areas to inspect.
4. Mixing Inspection
The mixing process should produce a consistent mixture throughout the batch.
Inspect:
- Mixer condition
- Mixing time
- Mixing sequence
- Moisture consistency
- Material distribution
- Mixer cleanliness
The mixture should not contain obvious areas of excessive dryness, excessive moisture, or poorly distributed aggregate.
A consistent mixing process helps reduce variations between blocks produced from the same batch.
5. CMU Manufacturing Machine Inspection
The block-making machine should be inspected regularly because machine condition can directly affect production consistency.
Check:
- Hydraulic system
- Vibration system
- Pressure settings
- Sensors
- Controls
- Moving components
- Conveyor system
- Pallet handling
- Lubrication
- Safety components
Basic equipment checks should be performed regularly, while detailed maintenance and calibration should follow the machine manufacturer’s recommendations.
For more information about the machinery used during CMU production, see our:
Machine settings have a major effect on block consistency and production quality. Learn more about equipment types, vibration, hydraulic compaction, molds, and production systems in our CMU Block Manufacturing Machine Guide.
6. CMU Mold Inspection Checklist
The mold is one of the most important components affecting block dimensions and appearance.
Inspect molds for:
- Wear
- Damage
- Cracks
- Deformation
- Material buildup
- Dirty surfaces
- Damaged edges
- Incorrect alignment
A worn or damaged mold can produce:
- Uneven dimensions
- Poor edges
- Deformed cores
- Surface defects
- Inconsistent block geometry
Molds should be cleaned and maintained regularly.
7. Vibration and Compaction Inspection
Vibration and compaction are critical stages of CMU manufacturing.
Inspect:
- Vibration operation
- Vibration consistency
- Hydraulic pressure
- Compaction settings
- Machine cycle
- Material distribution
- Mold filling
Poor vibration or compaction can contribute to:
- Honeycombing
- Voids
- Weak areas
- Rough surfaces
- Poorly formed corners
- Inconsistent density
For detailed information about common production defects and their causes, see our:
Problems with vibration, compaction, moisture, and mold filling can create several CMU defects. Learn how to identify and prevent them in our Common CMU Manufacturing Defects guide.
8. Fresh CMU Block Inspection
Fresh blocks should be inspected immediately after demolding.
This is an important inspection stage because problems can often be identified before additional blocks are produced.
Check:
- Shape
- Dimensions
- Corners
- Edges
- Surface finish
- Core shape
- Cracks
- Voids
- Honeycombing
- Collapse
- Block stability
If fresh blocks suddenly show defects, investigate the production settings before continuing with a large batch.
Fresh Block Inspection Checklist
Use this quick checklist during production:
✓ Correct shape
✓ Correct dimensions
✓ Proper corners
✓ Proper edges
✓ Uniform surface
✓ No visible cracks
✓ No major voids
✓ No honeycombing
✓ Cores properly formed
✓ Block remains stable after demolding
9. Pallet Inspection
Production pallets should remain clean, level, and structurally sound.
Inspect for:
- Warping
- Cracks
- Damage
- Uneven surfaces
- Excessive material buildup
- Contamination
Damaged or uneven pallets can deform freshly produced blocks.
A pallet problem can therefore sometimes appear to be a block-production problem when the actual cause is inadequate pallet support.
10. Curing Inspection
Curing is one of the most important stages in CMU manufacturing because cement continues to hydrate during this stage and the blocks develop their strength and durability.
Inspect:
- Temperature
- Humidity
- Curing duration
- Moisture retention
- Block handling
- Curing chamber conditions, where applicable
Poor curing conditions can contribute to:
- Low strength
- Cracking
- Inconsistent quality
- Durability problems
For detailed information about CMU curing, see our:
Proper curing is essential for CMU strength and durability. Learn more about curing methods, time, temperature, humidity, and moisture control in our CMU Block Curing Process Guide.
11. Finished CMU Dimensional Inspection
After curing, finished blocks should be checked for dimensional consistency.
Inspect:
- Length
- Width
- Height
- Core dimensions
- Face shell condition
- Web condition
- Edge condition
Consistent dimensions are important for proper masonry installation and mortar joint alignment.
For more information about common CMU dimensions and sizes, see our:
Dimensional consistency is essential for proper masonry construction. Learn more about standard CMU measurements and block dimensions in our CMU Block Sizes Chart.
12. Surface Quality Inspection
Inspect finished blocks for:
- Cracks
- Chips
- Broken corners
- Rough surfaces
- Honeycombing
- Voids
- Uneven texture
- Color variation
- Surface contamination
For architectural CMU, surface consistency becomes especially important because the blocks may remain exposed after construction.
13. CMU Block Density Inspection
Density can be an important quality-control measurement because it can help identify variations in manufactured units.
Check for unusual differences in:
- Block weight
- Density
- Aggregate distribution
- Moisture condition
Unexpected changes may indicate problems with:
- Batching
- Moisture
- Compaction
- Material distribution
Density inspection should be considered alongside other quality checks rather than used as the only indicator of block quality.
14. Compressive Strength Testing
Finished CMU should be tested according to the manufacturer’s quality program and applicable project requirements.
Strength testing helps determine whether manufactured blocks are achieving the intended performance.
A block can look visually acceptable while still having inadequate strength, which is why visual inspection alone is not enough.
For more information about CMU strength, see our:
Visual inspection cannot determine the complete structural performance of a CMU. Learn more about the factors affecting CMU compressive strength and strength testing.
15. Moisture Inspection
Moisture should also be monitored during production and curing.
Check:
- Aggregate moisture
- Fresh mix moisture
- Curing moisture
- Storage conditions
- Excessive water exposure
Changes in moisture can affect production consistency and finished block properties.
16. Color Consistency Inspection
For standard gray CMU, color variation can still indicate differences in materials, moisture, curing, or production conditions.
For colored CMU, color consistency becomes even more important.
Inspect:
- Block-to-block color
- Batch-to-batch color
- Pigment dosage
- Aggregate appearance
- Curing consistency
Significant color variation should be investigated before the entire batch is shipped.
17. Handling and Storage Inspection
Finished blocks can be damaged after manufacturing even when they were produced correctly.
Inspect for:
- Improper stacking
- Forklift damage
- Premature movement
- Uneven pallet support
- Weather exposure
- Broken corners
- Chipped edges
Proper handling helps preserve the quality achieved during manufacturing.
Quick Daily CMU Manufacturing Inspection Checklist
Before Production
✓ Inspect raw materials
✓ Check material storage
✓ Verify batching equipment
✓ Inspect scales
✓ Check mixer
✓ Inspect molds
✓ Check pallets
✓ Inspect machine condition
✓ Verify machine settings
During Production
✓ Monitor mix consistency
✓ Check vibration
✓ Check compaction
✓ Inspect fresh blocks
✓ Check dimensions
✓ Check surface finish
✓ Monitor machine performance
✓ Record defects
After Production
✓ Inspect curing conditions
✓ Check finished dimensions
✓ Inspect surface quality
✓ Check density
✓ Perform required testing
✓ Inspect pallets
✓ Check storage conditions
✓ Record production results
18. Batch Acceptance and Rejection
After inspection and testing, manufacturers need a consistent process for deciding whether a production batch is acceptable.
A batch should not be judged on appearance alone. The evaluation may include:
- Visual condition
- Dimensions
- Density
- Compressive strength
- Surface quality
- Moisture condition
- Production records
- Applicable project requirements
If a significant problem is identified, the affected material should be separated until the cause and disposition are determined.
19. Defect Recording
Every significant defect should be documented.
A useful defect record can include:
- Date
- Production shift
- Batch number
- Machine used
- Mold used
- Operator
- Type of defect
- Number of affected blocks
- Suspected cause
- Corrective action
- Final disposition
Keeping these records makes it easier to identify patterns.
For example, if corner breakage repeatedly occurs during one production shift, the manufacturer can investigate machine settings, mold condition, handling, or curing conditions instead of treating every damaged block as an isolated incident.
20. Inspection Frequency
Inspection frequency should be appropriate for the production operation and quality program.
Before Each Production Run
Check:
- Materials
- Mixer
- Machine
- Molds
- Pallets
- Settings
During Production
Check:
- Mix consistency
- Fresh block appearance
- Dimensions
- Vibration
- Compaction
- Machine performance
After Production
Check:
- Curing
- Finished dimensions
- Surface quality
- Density
- Required strength testing
- Storage
Routine inspections should continue throughout the production shift rather than being limited to one inspection at the beginning or end.
21. Root-Cause Analysis
When a defect is discovered, the objective should not simply be to remove the defective blocks.
The manufacturer should determine why the defect occurred.
For example:
Problem:
CMU blocks have excessive honeycombing.
Possible areas to investigate:
- Mix moisture
- Aggregate grading
- Mold filling
- Vibration
- Hydraulic pressure
- Machine settings
- Mold condition
Problem:
Blocks have broken corners.
Possible areas to investigate:
- Fresh block handling
- Demolding
- Mold condition
- Block moisture
- Curing
- Pallet condition
Problem:
Strength results are lower than expected.
Possible areas to investigate:
- Cement quantity
- Aggregate proportions
- Moisture
- Mixing
- Compaction
- Curing
- Testing procedure
Root-cause analysis helps prevent the same problem from occurring repeatedly.
22. Corrective Action
Once the likely cause has been identified, corrective action should be documented and implemented.
Corrective actions may include:
- Adjusting mix proportions
- Correcting moisture
- Cleaning molds
- Replacing damaged molds
- Adjusting vibration
- Adjusting compaction
- Repairing machinery
- Improving curing conditions
- Training operators
- Improving material storage
- Changing handling procedures
After corrective action, the affected process should be checked again to confirm that the problem has been reduced or eliminated.
23. Preventive Maintenance Inspection
Manufacturing equipment should be inspected before small problems become major production failures.
Daily maintenance may include:
- Cleaning molds
- Lubricating moving components
- Inspecting hydraulic hoses
- Checking vibration motors
- Tightening loose bolts
- Cleaning sensors
- Inspecting conveyors
Preventive maintenance can improve production consistency and reduce unexpected downtime.
24. Final Finished-Block Inspection
Before blocks are released for delivery, perform a final inspection.
Check:
Appearance
✓ No unacceptable cracks
✓ No major chips
✓ No severe honeycombing
✓ Consistent surface finish
Dimensions
✓ Length checked
✓ Width checked
✓ Height checked
✓ Core configuration checked
Physical Quality
✓ Density checked where required
✓ Strength testing completed where required
✓ Blocks properly cured
Handling
✓ Pallets are stable
✓ Blocks are stacked properly
✓ No obvious forklift damage
✓ Storage conditions are acceptable
25. CMU Inspection Documentation
Good documentation is an important part of a quality-control program.
Records should make it possible to trace finished products back to their production conditions.
Useful records include:
- Material deliveries
- Batch quantities
- Mix information
- Machine settings
- Production dates
- Production shifts
- Mold identification
- Curing conditions
- Inspection results
- Test results
- Defect records
- Corrective actions
- Shipment information
Accurate records can also help identify long-term production trends.
Complete CMU Manufacturing Inspection Checklist
Use the following checklist as a quick reference.
Raw Materials
✓ Cement inspected
✓ Aggregates inspected
✓ Sand inspected
✓ Water checked
✓ Admixtures checked
✓ Pigments checked where applicable
Batching and Mixing
✓ Batch quantities verified
✓ Scales checked
✓ Moisture correction verified
✓ Mixing sequence checked
✓ Mixing time checked
✓ Mixture consistency checked
Machine and Mold
✓ Machine inspected
✓ Hydraulic system checked
✓ Vibration system checked
✓ Mold inspected
✓ Mold cleaned
✓ Pallets inspected
Fresh Blocks
✓ Shape checked
✓ Dimensions checked
✓ Corners checked
✓ Edges checked
✓ Surface checked
✓ Cores checked
✓ Cracks checked
✓ Honeycombing checked
Curing
✓ Temperature monitored
✓ Humidity monitored
✓ Curing duration recorded
✓ Moisture conditions monitored
✓ Handling checked
Finished Blocks
✓ Dimensions checked
✓ Surface quality checked
✓ Density checked where required
✓ Strength testing completed where required
✓ Color consistency checked
✓ Damage checked
Storage and Shipment
✓ Pallets stable
✓ Blocks properly stacked
✓ Forklift damage checked
✓ Weather exposure controlled
✓ Shipment records completed
What Should You Do When a CMU Defect Is Found?
When a significant defect is discovered, follow a consistent process:
1. Identify the defect
Determine exactly what is wrong.
2. Isolate affected blocks
Prevent potentially defective material from being mixed with acceptable products.
3. Check production records
Review the batch, machine settings, materials, and curing conditions.
4. Investigate the root cause
Determine where the problem originated.
5. Apply corrective action
Adjust the process, equipment, materials, or handling procedure as necessary.
6. Reinspect
Check subsequent production to determine whether the problem has been corrected.
7. Document the result
Record the defect, cause, action, and outcome.
This process turns inspection into a continuous improvement system rather than simply a method of rejecting defective blocks.
How Inspection Helps Reduce CMU Manufacturing Waste
Early inspection can prevent large quantities of defective blocks from being produced.
For example, if an operator discovers a mold problem after the first few blocks, production can be stopped and the mold corrected.
Without early inspection, hundreds of blocks could potentially be produced before the problem is discovered.
This is why frequent inspection is often more valuable than relying entirely on final inspection.
CMU Manufacturing Quality Control vs Inspection
Quality control and inspection are related but are not exactly the same.
Inspection focuses on checking materials, processes, equipment, and finished products.
Quality control uses inspection results, testing, documentation, corrective actions, and process improvements to maintain consistent production quality.
A strong manufacturing system needs both.
For a broader look at the complete quality-control process, see our:
Inspection is one part of a larger manufacturing quality system. Learn more about production quality planning, testing, documentation, and process control in our CMU Block Quality Control Guide.
Final Thoughts
A reliable CMU Block Manufacturing Inspection Checklist should cover the entire production process rather than focusing only on finished blocks.
The most effective approach starts with raw material inspection and continues through:
Batching → Mixing → Machine Setup → Mold Inspection → Vibration → Compaction → Fresh Block Inspection → Curing → Testing → Final Inspection → Storage
When defects are discovered, manufacturers should identify the root cause, apply corrective action, and document the result.
Consistent inspection helps reduce waste, improve block quality, identify equipment problems earlier, and maintain a more reliable manufacturing process.
Most importantly, quality inspection should be treated as a continuous process, not a final step before shipment.
Frequently Asked Questions
How often should CMU blocks be inspected during manufacturing?
Routine inspections should be performed throughout production, with additional testing and detailed inspections according to the manufacturer’s quality program and applicable project requirements.
What should be checked immediately after demolding?
Check the block’s shape, dimensions, corners, edges, surface, cores, cracks, voids, honeycombing, and overall stability.
Why should CMU molds be inspected?
Mold wear or damage can produce inconsistent dimensions, deformed cores, poor edges, and surface defects.
What causes variations between CMU batches?
Variations can result from changes in raw materials, moisture, batching, mixing, machine settings, vibration, compaction, curing, or handling.
What should happen when defective CMUs are found?
Affected blocks should be identified and separated, the root cause should be investigated, corrective action should be taken, and the results should be documented.
Is visual inspection enough for CMU quality control?
No. Visual inspection is important, but dimensional checks, density measurements, strength testing, and other applicable quality-control procedures may also be required.
Related Calculators
- CMU Block Calculator
- Concrete Calculator
- Cement Calculator
- Sand Calculator
- Gravel Calculator
- Mortar Calculator