
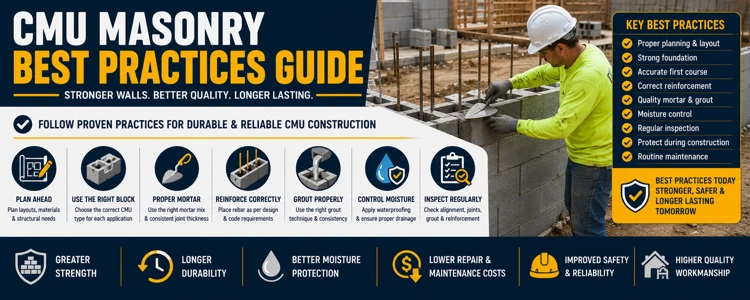
Good CMU masonry practice means building the specified wall in the right sequence and checking details before they become concealed. Start with coordinated drawings, a verified supporting foundation, and accurate layout. Then control mortar work, reinforcement, grout placement, moisture details, and protection throughout construction.
A straight-looking wall is not proof that its concealed reinforcement, connections, or drainage are correct. This guide organizes practical checks for conventional mortared concrete masonry. Dry-stack and proprietary wall systems require their own approved instructions.
Construction checks by stage
| Stage | Main check | Resolve before proceeding |
|---|---|---|
| Before laying | Drawings, materials, foundation, and layout agree | Incorrect dowels, conflicting opening locations, or unapproved substitutions |
| During laying | Courses, joints, openings, and embedded items follow the details | Misalignment, incomplete specified joints, or obstructed grout spaces |
| Before grouting | Reinforcement, splices, cells, and inspection access are ready | Missing bars, displaced steel, debris, or unresolved inspections |
| During protection | Temporary stability and weather protection remain effective | Unsafe unsupported work or unprotected unfinished wall tops |
| Before handover | Drainage, joints, cleaning, and records are complete | Blocked outlets, damaged finishes, missing connections, or undocumented changes |
1. Coordinate the work before ordering blocks
Review the wall elevations, sections, opening schedules, reinforcement drawings, and specifications together. Confirm the unit sizes, special shapes, mortar requirements, grout locations, connectors, flashing, and movement joints.
Identify which requirements belong to the structural design and which belong to architectural finishes or moisture management. If two details conflict, obtain clarification before that work is built.
Prepare a takeoff that distinguishes ordinary stretchers from corners, jamb units, bond-beam units, and other shapes. Use the types of CMU blocks guide to understand the available configurations. Product names do not replace the project’s approved selections.
2. Check delivered materials and storage
Match delivery tickets and product markings to the approved order. Keep different sizes, shapes, colors, and products identifiable so similar-looking units are not mixed inadvertently.
Protect bagged materials from moisture and contamination. Store blocks on suitable supports and keep materials accessible without creating unstable stacks or obstructing the work area. Follow the manufacturers’ storage instructions.
Review damaged units against the project’s acceptance requirements. A unit that is unsuitable for an exposed face should not automatically be assumed acceptable for a structural or concealed location.
3. Verify the foundation and first-course layout
Before laying, check the supporting surface, elevations, wall lines, corners, and openings. Remove material that would interfere with the required bond or bearing. Verify foundation dowel locations against the wall’s cells and reinforcement arrangement.
A dry layout can reveal awkward cuts or conflicts before mortar is placed. For a common modular block system, nominal dimensions include the intended joint allowance; use the standard CMU dimensions guide to understand the difference from manufactured dimensions.
Establish the first course carefully and check level, alignment, and opening positions. Do not conceal a foundation or dowel mismatch by bending steel, cutting units excessively, or making unapproved changes to the specified bed joint.
4. Mix the specified mortar consistently
Use the specified mortar product or approved mix. Follow its instructions for water, mixing, use time, and any permitted retempering. Measure consistently instead of changing the batch to compensate for poor preparation or slow work.
Retempering is not an unlimited way to keep mortar usable. Manufacturer instructions may distinguish replacing water lost through evaporation from extending the use of mortar that must be discarded. Colored mortar can also show appearance changes when water or mixing practices vary.
Mortar and grout serve different purposes. Do not substitute masonry mortar for specified cell grout simply because both contain cementitious materials.
5. Build complete joints and check alignment as work rises
Provide the specified bed and head joints for the actual unit and wall configuration. Required mortar bedding can differ between hollow units, solid units, and special details; follow the drawings and governing specification rather than assuming one bedding arrangement fits every wall.
Check course elevations, plumb, level, bond pattern, and opening dimensions regularly. Correct placement problems while the work can be properly adjusted. Do not rely on later coatings or finishes to hide missing joint work.
Tool exposed joints to the required profile at suitable mortar consistency. Match the approved sample panel where one is required. Keep mortar smears and droppings under control as construction proceeds, especially inside spaces that will receive grout or provide drainage.
6. Install reinforcement and connectors before concealment
Check bar size, location, spacing, support, and specified development or splice details. Verify reinforcement at corners, wall ends, intersections, openings, and bond beams. Confirm connectors and embedded items are positioned where the next trade expects them.
A bar resting against a block face may not provide the required clearance for grout. A lap that appears long enough is not a substitute for the specified detail. Resolve discrepancies before continuing.
The guide to reinforcing a CMU wall explains the relationship between steel, grout, and the masonry assembly. The approved reinforcement schedule controls the project.
7. Treat the pre-grout review as a deliberate checkpoint
Before grout is placed, confirm that the intended cells and channels are accessible and free of obstructing debris. Verify reinforcement, splices, embedded items, and the required inspection or cleanout arrangements.
Plan how grout will reach the designated spaces without losing control of placement. Confirm the specified grout, placement sequence, and consolidation requirements. Conventional grout and self-consolidating grout do not automatically use identical procedures.
Do not invent one universal lift or pour height for all masonry jobs. These limits depend on the applicable specification, grout system, construction conditions, and any approved alternative procedure. See the CMU grouting methods guide for the relevant process distinctions.
Practical example: a blocked reinforced cell
Suppose a scheduled inspection reveals mortar droppings obstructing a cell containing vertical reinforcement. The useful response is to identify and resolve the obstruction through the approved process, then confirm readiness before placement.
Pouring grout and hoping it flows around the blockage does not verify that the intended fill and bond have been achieved. This is why the check belongs before concealment.
8. Keep the designed water path open
Review flashing, transitions, end dams, drainage outlets, and sealant interfaces while the work is visible. Check that water has a continuous route to the intended exterior outlet and that mortar droppings do not obstruct drainage spaces.
Moisture details vary between cavity walls, veneer, and single-wythe construction. A coating or integral water repellent should not be assumed to replace every flashing and drainage detail.
For example, an installed flashing strip does little good if its termination or outlet is blocked. Verify the complete detail rather than checking only that a flashing material is present. The CMU wall drainage guide explains these coordinated components.
9. Coordinate control joints and openings
Construct movement and control joints at the specified locations with the required materials and reinforcement details. Do not fill a designated movement space with mortar simply to make the surface look continuous.
Reinforcement continuity, ties, and shear transfer at a joint must follow its design. Do not assume all steel should cross every joint, or that all steel should be cut at one.
Check jambs, lintels, bearing locations, and temporary support at openings before the work above proceeds. The CMU control joint guide covers crack-control concepts separately from construction workmanship.
10. Maintain temporary stability and weather protection
Plan temporary wall support and controlled access before construction begins. A partially completed wall may not have the roof, floor, or return-wall support assumed for the finished structure. Reinforcement inside it does not automatically establish construction-stage stability.
Keep required bracing and access controls in place until the responsible parties confirm that the required support conditions are satisfied. Do not treat nearby scaffolding as wall bracing unless that arrangement has been designed and approved for the purpose.
Cover unfinished wall tops when work stops and implement the project’s hot- or cold-weather procedures. Air temperature alone does not capture all relevant conditions: wind, material temperatures, and exposure also affect the work. Follow the applicable protection requirements without applying one generic heating, cooling, or waiting rule to every job.
11. Clean a sample area and complete the records
Use cleaning products and methods suitable for the units, mortar, and finish. Test the proposed approach in an inconspicuous area or approved sample panel before treating the full wall. Protect nearby materials and follow the product instructions.
Do not assume aggressive pressure or a strong acid is an acceptable shortcut for removing hardened smears. Surface damage or altered appearance can remain after the wall looks clean.
Before handover, review drainage outlets, joint completion, visible defects, connection completion, and required inspection or test records. Document approved field changes and pass along maintenance information relevant to the installed materials.
Frequently asked questions
What is the most useful CMU workmanship checklist?
Use a staged checklist tied to the project drawings. Check layout before laying, joints and alignment during laying, reinforcement and cells before grouting, and drainage and records before handover. A generic checklist should be adapted to the actual wall.
Can more grout compensate for poor workmanship?
No. Extra grout does not demonstrate that obstructed cells, missing reinforcement, inadequate splices, or deficient connections have been corrected. Use the specified fill arrangement and approved corrective procedures.
Does every CMU wall use the same mortar or joint profile?
No. Product, exposure, wall configuration, appearance, and specification requirements govern the selection. Follow the approved materials and details.
When should an inspector be involved?
Arrange required inspections and testing before work begins. Coordinate visits around the points at which important work would otherwise become concealed. The CMU wall inspection guide provides additional inspection context.